How to install wordpress plugins for beginners (step by step)
 More than 50 million sites around the web runs in wordpress platform, which is a free and widely used open source blogging tool. So developers around the world taking part in developing more plugins and themes for wordpress.
Here in this post you will learn how to install plugins in your wordpress site. But before that this is the main portal for all wordpress plugins http://wordpress.org/plugins/ you can find tons of plugins that needed for your blog.
1. How to install wordpress plugins through admin panel
This one is the quick and easiest way most people follow to install wordpress plugin
- Login to your sites admin panel
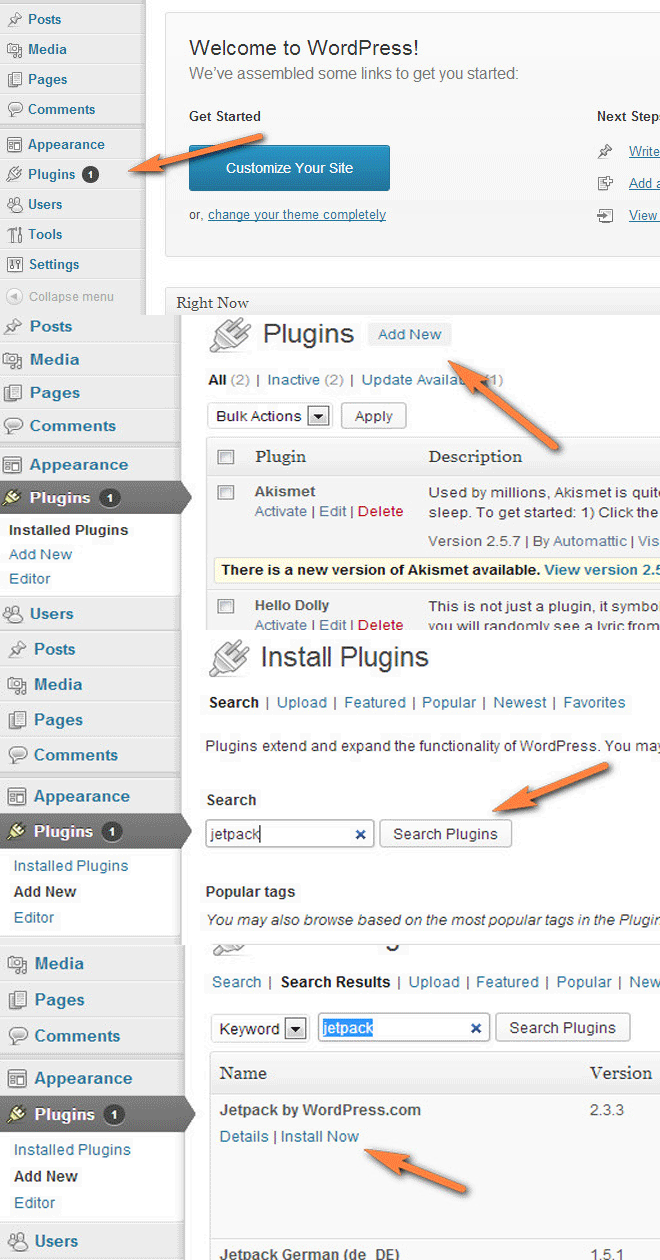
- You can see plugins in the left side of your admin panel, click plugins.
- You will be seeing installed plugins in that page. Now click Add New at the top
- Type your plugin name in the search box and click install now. Activate plugin in the next screen.

2. Uploading plugins through admin panel
- Go to http://wordpress.org/plugins/ and choose a plugin
- Click download. Now a .zip file downloads to your pc
- Now go to your sites admin panel and click plugins
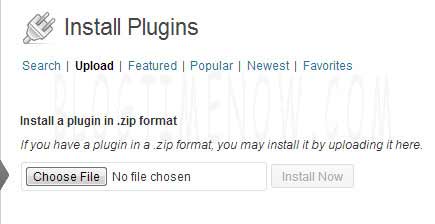
- Click Add new. Now you can see upload option near to search. Click upload
- Choose the file you downloaded and click install now. Activate plugin.

3. Uploading plugins via FTP(File Transfer Protocol)
This one is something more tricky than the above methods that is not recommended for beginners. First you need an FTP client. FileZilla is a free tool which I have mentioned in this article you can download it here Top free web development softwares.
- Connect your site in site manager of FileZilla
- Go to /public_html/wp-content/plugins
- Just drag and drop the plugin file here (plugin files should be unzipped)
- Now activate the plugin with your sites admin panel in plugin area.

