 After publishing this article on splitting wordpress posts into multiple pages few folks asked us about doing it in Blogger that is to split long blog post into multiple pages in Blogger. Splitting posts in wordpress is very simple and there are many plugins to achieve this, but how it’s done in Blogger. In Blogger there is no build in feature to split posts or pages and there are no widgets to paginate, but by using a simple jQuery function you can paginate your blog posts. So why to split a blog post? We have already discussed all the benefits of adding pagination to blog posts in this article. Here we will show you how to split long blog post in Blogger into multiple pages.
Don’t panic, the code below is simple and easy to understand. Assume that you are about to publish a long blog post and would like to split that into 4 pages. Here is how you do that in just 3 simple steps.
How to split long blog post in Blogger into multiple pages
Step 1: Usually you will edit your post in compose mode, but this time you are going to do this in HTML mode. Switch to HTML editor, add the span element that you see below and add your blog content in each element respectively. From the below lines you can see that only 1st page content is visible and the remaining 2nd, 3rd and 4th pages are hidden. So the remaining pages will be visible only if the visitor navigates.
<span class="content1">
Add your first page content here
</span>
<span class="content2" style="display:none">
Add your second page content here
</span>
<span class="content3" style="display:none">
Add your third page content here
</span>
<span class="content4" style="display:none">
Add your final page content here
</span>
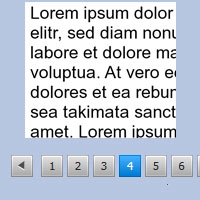
Step 2: Hope you have added your content. Now you have to create page links so when a user clicks on that page he or she should get that particular content. Just below to the above code add this one which adds Pages: 1 2 3 4 links below your post content.
<p><b>Pages: <span style="color: #3d85c6;">
<a href="#" class="page1">1</a>
<a href="#" class="page2">2</a>
<a href="#" class="page3">3</a>
<a href="#" class="page4">4</a></span></b></p>
Step 3: Next to make this links to work add the following script just below the pagination links.
<script src="//ajax.googleapis.com/ajax/libs/jquery/1.11.1/jquery.min.js"></script>

<script style="text/javascript">
jQuery(document).ready(function(){
jQuery('.page1').click(function(){
jQuery('.content1').show();
jQuery('.content2').hide();
jQuery('.content3').hide();
jQuery('.content4').hide();
return false;
});
jQuery('.page2').click(function(){
jQuery('.content1').hide();
jQuery('.content2').show();
jQuery('.content3').hide();
jQuery('.content4').hide();
return false;
});
jQuery('.page3').click(function(){
jQuery('.content1').hide();
jQuery('.content2').hide();
jQuery('.content3').show();
jQuery('.content4').hide();
return false;
});
jQuery('.page4').click(function(){
jQuery('.content1').hide();
jQuery('.content2').hide();
jQuery('.content3').hide();
jQuery('.content4').show();
return false;
});
});
</script>
That’s it! When everything is done publish your article and view it where you will see page links below the content. Just click on the links to see how it works. Hope that helped you to split long blog posts in Blogger into multiple pages. Got any questions? Feel free to ask below in comments section.